I’ve read in a post that light is the most important thing in a 3D render. Light setup can bring up a mood and it can guide your eyes. So, for my recent model I tried to play with lights. For the model I had the idea to create a water tower with Lego head on top (I sometimes see faces on random things. Don’t ask me why.) When I modelled this water tower I wanted to render one scene, but I found this opportunity to study more about lights. I decided to render same model with different lighting such as sunset, night and afternoon. I was interested in night photography for a long time. I think it’s incredible, because even though there is darkness, photographers always find alternative ways to find lights. It’s either natural lights like moon and stars or artificial lights like urban lights and electric lights.
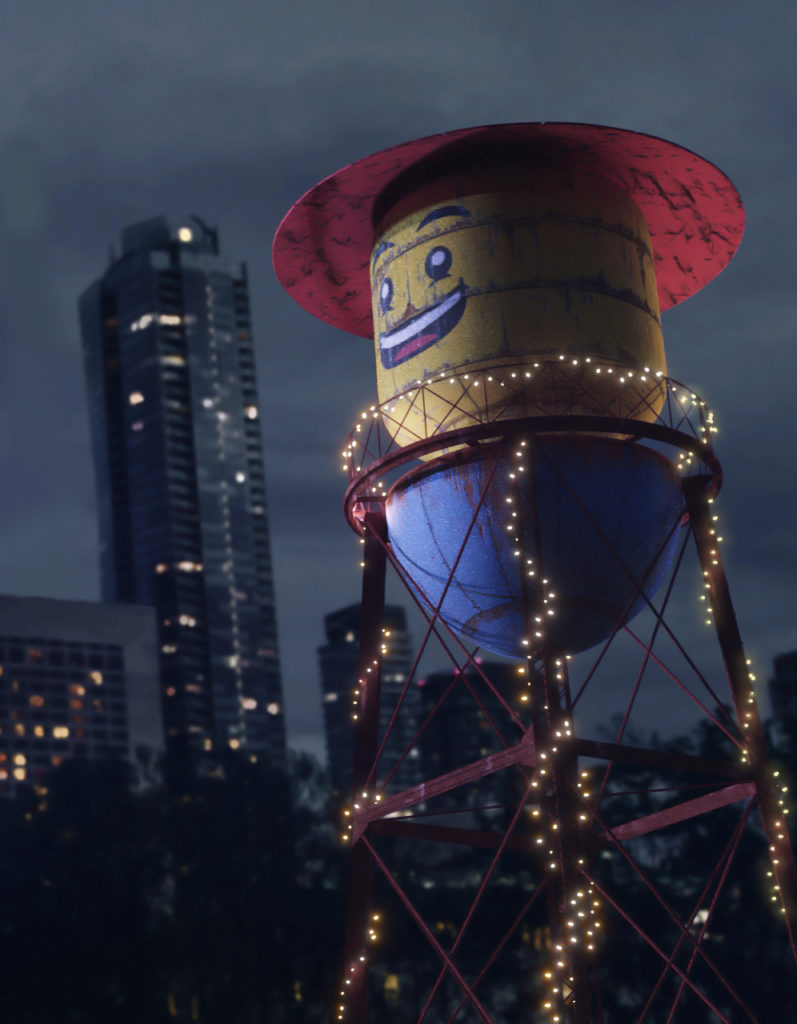
Night Shot:
I searched a bit about photography online and lucancoutts and matialonsor really interested me. I noticed in Lucan’s photos he uses Photoshop to create more bloom and glow effects. To explore on this idea I created lights and wired them all around the water tower so it matches the city lights. Matching the render saturation with the background photo was challenging. I had to tweak the level adjustment and hue/saturation to match the photo.
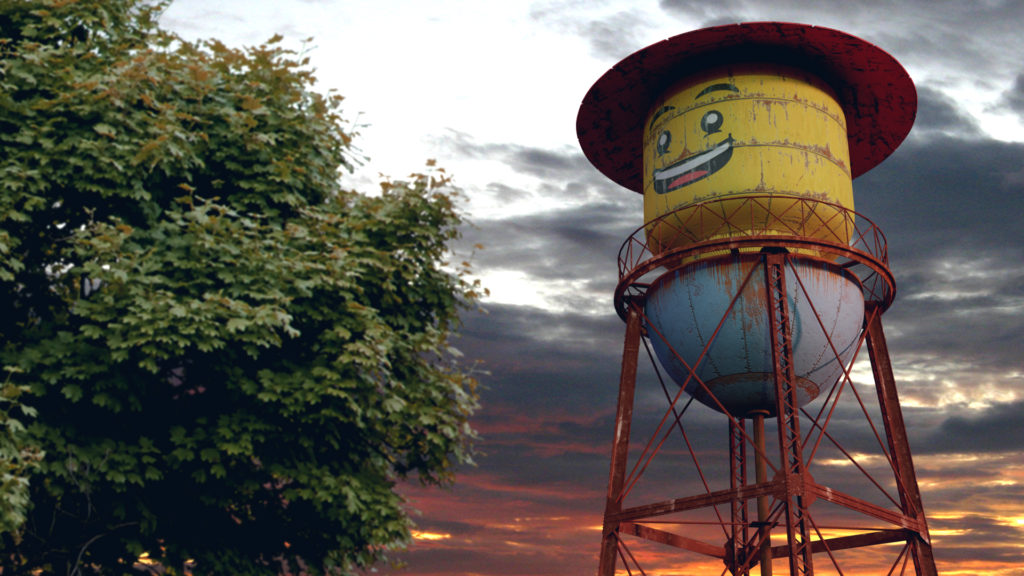
Afternoon Shot:
The afternoon render was much simpler because I used softer shadows to depict the sunset and of course 360 HDR image. The sky is a stock image and tree is a PNG. They were edited together in Photoshop later with some quick colour correction.
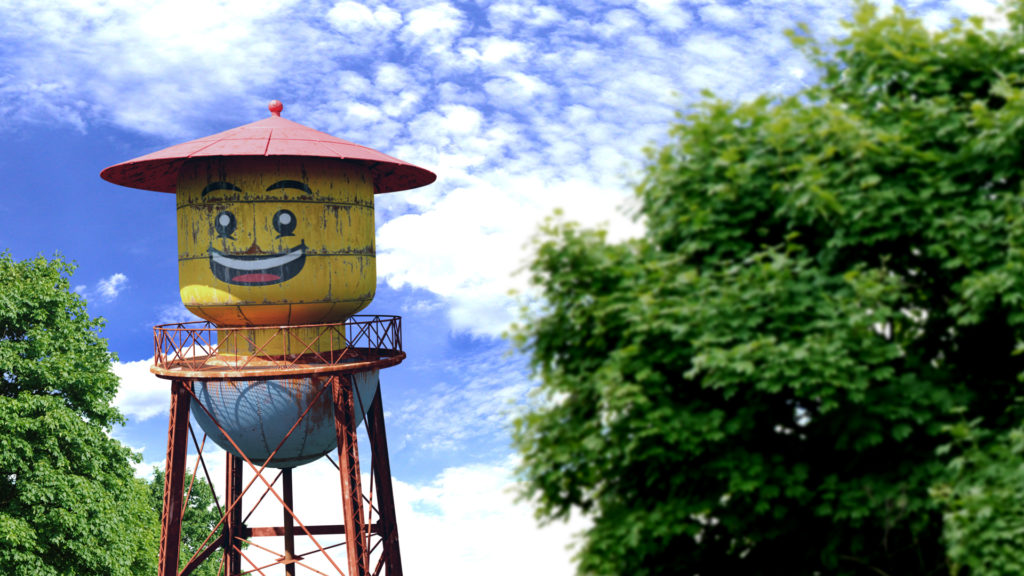
Daylight Shot:
The daylight render was the first one that I worked on and to be honest it didn’t turn out well. What I should have considered in first place would have been the perspective, but I didn’t check it at all. The water tower looks miniature on this render. To solve this problem I made a block in regular human size and placed it near the model. I re-scaled my model until the block looked like a human standing beside it. After that i didn’t have issue with perspective.
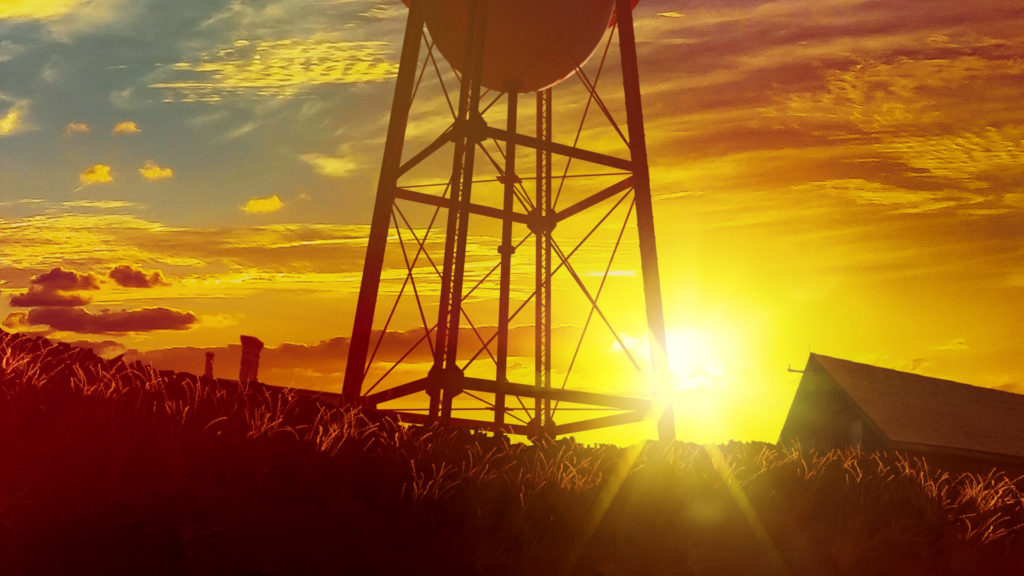
Sunset Shot:
The sunset render is my favourite because I worked on this the most. It took longer because I had so many plans on this. I wanted to create a hill and something for background. I used an image plane for houses and modelled a simple hill to place grass particles on it. There was a problem with my particle settings. Somehow it didn’t show them the way I wanted. I imagined it to be a hill full of grass with sun shinning through them. After I tweaked the translucency of grass texture it looked better and I left them like that. Some of the post-processing was done in Blender like light streaks and some in Photoshop. For the final adjustment I used light leak texture on top to finish it off.
I’ve learned many things when I worked on this project. I think it’s fine to edit and post-process your renders in Photoshop. You can enhance the effects or add more elements to it. I’ve also learned to list out the solutions to problem and choose the one that is more efficient and less time consuming. When I modelled the lights to wrap around the bases, I thought I could do this to all four individuals but it took really long. I could do one and make three copies or make one and rotate once in a while to avoid repetition. Rotating the object path would ruin the translation and it would take longer to rematch with the bases. So, I decided to duplicate and rotate by 25 degrees. Since the four bases face different directions you can’t notice the repetition. It’s 2019 and I plan to create more 3D modelling and probably make a game. I love video games and it’s my dream to participate in a game project or work in a studio. Let’s hope for a better 2019!